Recently, I have been asked about Pentaho's product interaction with social network providers such as Twitter and Facebook. The data stored deep within these "social graphs" can provide its owners with critical metrics around their content. By analyzing trends within user growth and demographics, and consumption and creation of content, owners and developers are better equipped to improve their business with Facebook and Twitter. Social networking data can be viewed and analyzed utilizing existing tools such as FB Insights or even purchasable 3rd party software packages created for this specific purpose. Now...Pentaho Data Integration in its traditional sense is an ETL (Extract Transform Load) tool. It can be used to extract and extrapolate data from these services and merge or consolidate it with other relative company data. However, it can also be used to automatically push information about a company's product or service to the social network platforms. You see this in action if you have ever used Facebook and "Liked" something. At regular intervals, you will note unsolicited product offers and advertisements posted to your wall or news feed from those companies. A great way to get the word out.
Interacting with these systems is possible because they provide an API. (Application Programming Interface) To keep it simple, a developer can write a program in "some language" to run on one machine which communicates with the social networking system on another machine. The API can leverage a 3GL such as Java or JavaScript or even simpler RESTful services. At times, software developers will write connectors in the native API that can be distributed and used in many software applications. These connectors offer a quicker and easier approach than writing code alone. It may be possible within the next release of Pentaho Data Integration, that a Facebook and/or Twitter transformation step is developed - but until then the RESTful APIs provided work just fine with the HTTP POST step.

The Facebook Graph API
Both Facebook and Twitter provide a number of APIs, one worth mentioning is the Facebook Graph API (don't worry Twitter, I'll get back to you in my next blog entry).
The Graph API is a RESTful service that returns a JSON response. Simply stated an HTTP request can initiate a connection with the FB systems and publish / return data that can then be parsed with a programming language or even better yet - without programing using Pentaho Data Integration and its JSON input step.

Since the FB Graph API provides both data access and publish capabilities across a number of objects (photos, events, statuses, people pages) supported in the FB Social graph, once can leverage both automated push and pull capabilities.
Tutorial: Publishing content to a Facebook Wall Using Pentaho Data Integration
The following is an example of a reference implementation to walk you through the steps to be able to have Pentaho Data Integration automatically post content to a FB Wall.
It is broken down into the following steps:
- Create a new FB Account
- Create a new unique FB user name
- Create a new FB application
- Obtain permanent OAUTH access token
- Create PDI transformation
Step 1: Created a new FB account
http://www.facebook.com

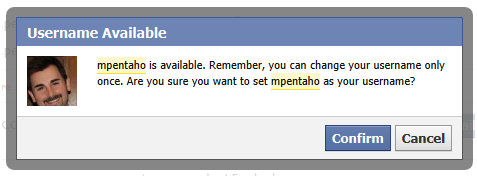
Step 2: Follow Instructions to setup your unique username
http://www.facebook.com/username/

Add your own - or accept the defaults.

Example: facebook.com/mpentaho
Step 3: Create a FB Application
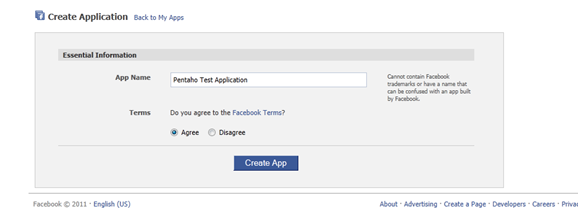
http://www.facebook.com/developers/createapp.php

Allow "Developer" access to your basic information.

After you allow access to the Developer App - go back here: https://www.facebook.com/developers/createapp.php if it does not redirect you.
Create Application
Security Check

Verify Information
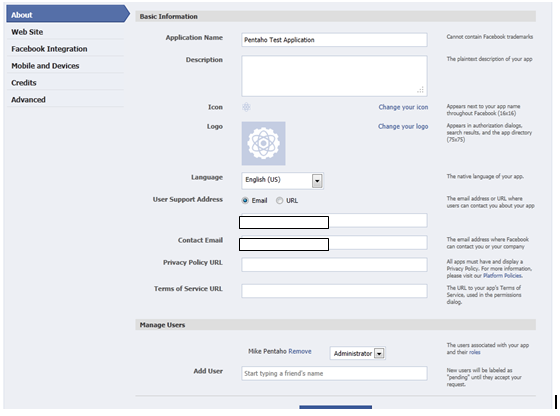
Click Web Site

Note your application ID and Application Secret
Examples:
Application ID: xxxxxxxxxxxxxxx
Application Secret: yyyyyyyyyyyyyyyyyyyyy
Enter your Site URL and Site Domain, this can be pretty much anything, but attempt to use your real information if available.

Note Settings, App ID, API Key and App Secret

Note: From here you can follow the link below for a detail tutorial on setting up permanent OAUTH access:
http://liquid9.tv/blog/2011/may/12/obtaining-permanent-facebook-oauth-access-token/
Below summarizes those steps:
Step 4: Obtain Permanent OAUTH Access Token:
Create and execute the below URL in your browser: Modify the below URL to use your client_id and redirect_uri - see notes in blog post link above set permission values accordingly. (http://developers.facebook.com/docs/authentication/permissions/)
Your client_id is your App ID and the redirect_uri can be anything.
Sample URL:
https://graph.facebook.com/oauth/authorize?client_id=...&redirect_uri=http://wordsofthefamily.com/&scope=read_insights,offline_access,publish_stream,create_event
Constructed URL:
https://graph.facebook.com/oauth/authorize?client_id=xxxxxxxxxxxxxx&redirect_uri=http://wordsofthefamily.com/&scope=read_insights,offline_access, publish_stream,create_event,rsvp_event,sms,publish_checkins,manage_friendlists,read_stream,read_requests,user_status,user_about_me
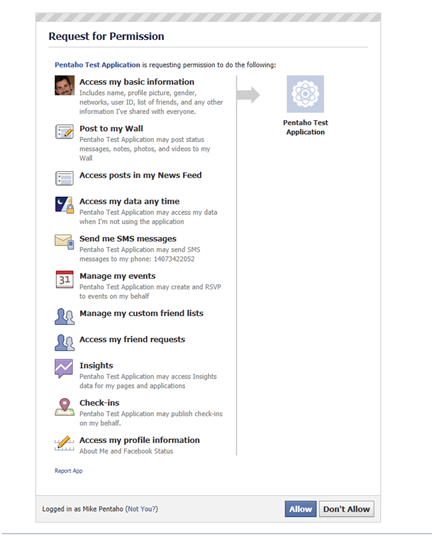
You will get the following screen - yours might be different depending on what permissions you selected - make sure at least that "Post to my Wall" is there.
If not verify your permissions based of off the permission link in the blog post.
Click Allow
Now note the URL that was created in the browser address bar and that you were redirected to your page that you placed in the redirect_url.
You need the code value.

The code parameter will be a very lengthy string of random characters. Copy this value and hang on to it for the construction of a new URL.
This URL will turn the generated code into a valid access token for your application.
Sample of what is returned:
http://wordsofthefamily.com/?code=fdfdfdfdfdfeereghyjj.eyJpdiI6IjczU2YwUVJmaUJocXJjM1plOUdzVVEifQ.psncSCrwu-1659AZCHd7UBpUdBYdKCmvwXSu2-WxLcxfRt6wtwKzcjYkblwshjbnRX0EhcSrbG_U83AOv9pDrfomcLB8SY3gH1VW083oM997NqM28czfeaWpd8uv6sjECODE Example: fdfdfdfdfrert-8Qoj7wFkUqoCKWSEk89aCwd2zM.eyJpdiI6IjczU2YwUVJmaUJocXJjM1plOUdzVVEifQ.psncSCrwu-1659AZCHd7UBpUdBYdKCmvwXSu2-WxLcxfRt6wtwKzcjYkblwshjbnRX0EhcSrbG_U83AOv9pDrfomcLB8SY3gH1VW083oM997NqM28czfxxxrrer
Now Create the Following:https://graph.facebook.com/oauth/access_token?client_id=...&client_secret=...&redirect_uri=http://liquid9.tv/&code=... Fill in your application ID, application secret, redirect uri, and the code we just copied. Again, ours looks like this:
Constructed:
https://graph.facebook.com/oauth/access_token?client_id=xxxxxxxxx&client_secret=yyyyyyyyyyyyyyy&redirect_uri=http://wordsofthefamily.com/&code=xxxxxxxxxxx9_A-8Qoj7wFkUqoCKWSEk89aCwd2zM.eyJpdiI6IjczU2YwUVJmaUJocXJjM1plOUdzVVEifQ.psncSCrwu-1659AZCHd7UBpUdBYdKCmvwXSu2-WxLcxfRt6wtwKzcjYkblwshjbnRX0EhcSrbG_U83AOv9pDrfomcLB8SY3gH1VW083oM997NqM2xxxxxxxxxx
You will get back an access token:
access_token=1111111332444877557776746ghhg758d8f970bd1cbc17.1-100002640151006|d9WWkjxODcel0ZVIZfMEv5YKc10 Now you should be able to use PDI and the HTTP POST step using the various FB GRAPH APIs to do things: http://developers.facebook.com/docs/reference/api/ such as posting content to the FB wall / news feed and etc.
Step 5: Created a PDI Transformation using the HTTP POST step and the FB Graph API with /PROFILE_ID/feed
- Create a new Transformation
- Use a Generate Rows Step (found under Input) to set the various Facebook parameter names that can be found here
http://developers.facebook.com/docs/reference/api/post/ - Make sure to use the access_token parameter and value you got from the steps above

- Add HTTP Post step (found under Lookup) and connect hop from Generate Rows

- Configure the HTTP Post step to use the feed RESTful service https://graph.facebook.com/mpentaho/feed
Refer to http://developers.facebook.com/docs/reference/api/ Publishing section for list of methods
Replace mpentaho with your unique user name you set up earlier
- Jump to the Fields tab and click "Get Fields" under the "Query parameter" panel

- Click OK, Save and right click on the HTTP Post Step and select Preview, then Quick Launch
- In a few seconds a panel should come up displaying your data
- Check the result column (at the end) and look for a return code such as:
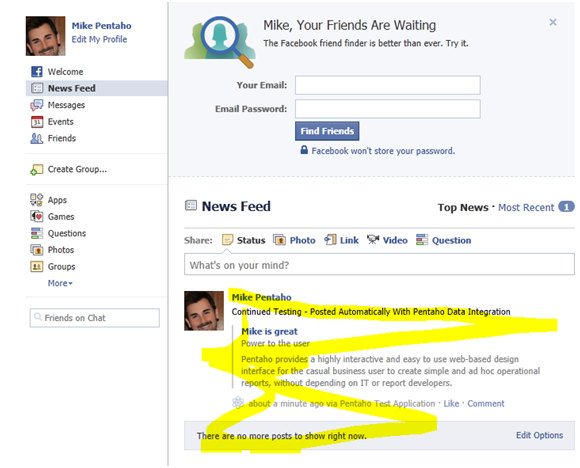
Example: {"id":"100002640151006_100565053374833"} - Check your newly created Facebook account wall and you should see
- If not check your FB account security and application privacy settings to ensure the application has access.
Regards,
Michael Tarallo
Director of Enterprise Solutions
Pentaho
